Monday, December 13, 2010

redo:)

This is my logo in real life and it was hard to get the color to match because the before picture, the bag was orange. I added the logo on and then skewed it so it fit more onto the bag:) 
I enjoyed this class & project!!!
-Erin<3 

Thursday, December 9, 2010


This is my business card, stationary, and envelope for Forever 21. The business card was probably the hardest to make because the idea I had at first wasn't representing my logo in the way that it should be. This one gives the idea of what my logo really is, a diamond with the name Forever 21 inside. The stationary was okay to make because once I decided that I wanted to keep the diamond theme, I had just had to place them down. The envelope was pretty straight forward so that was easy to make. I had all the information that was needed to make an envelope. I really enjoyed making these because it gave an time to show what else we can accomplish with the logo that we had designed. Overall, it was fun task to complete! :) Hopefully when we get to the final project, it will come out similar to this!
-Erin<3

Thursday, November 18, 2010

Forever 21 Logo! (:

I've always loved shopping and there is no doubt that Forever 21 is one of my favorite stores! Since they don't really have a logo yet, I decided that Forever 21 was the perfect store to make a logo for. I had some ideas to start off with, which consisted of like Walmart's old logo. the forever than a star and than 21 but after I had made it, I realized that the first one I created fit what Forever 21 is trying to get at : modern, fashion, and glamour. The diamond is representing the sparkly part of Forever 21, because we all know when you think of Forever 21, you think "ooooh, sparkles!" Making the diamond was a bit of a challenge because when Aisha came over to help me, it really took a while to make sure everything looked even. I picked a different border just to give it a different feel. The font was the hardest part because at first I wanted something curvy but than decided against it. A font that was modern was the way to go, so that's what I went with.
Overall, it was fun!
-Erin(:

Monday, November 1, 2010

Dairy Queen

This is my recreation of the logo for dairy queen. Overall, it was pretty simple to do, only with the problems that it was hard figuring out how to make everything together, like the whole Q, without making the O part of it overlapping the swirl. Trying to match the colors was a little bit confusing because they always seemed to be almost a shade off. Using the pen tool in a different program other than indesign seemed to make remembering how to use it tricker. So remembering how to actually use the pen tool was also difficult. I had to redo it before because not all the lines were connected because I didn't want them overlapping so when i filled into with the color, everything got filled in at once. Aisha then told me to make different levels so everything was connected but after I put the other shapes on top of them, you wouldn't be able to notice that the shapes on the bottom were overlapped. Overall, it wasn't to hard to handle and I think the end product came out really well. (: 
-Erin 

Saturday, October 23, 2010

New Recycle Signs!


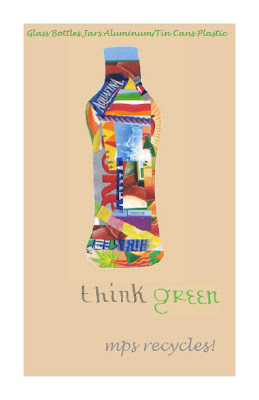
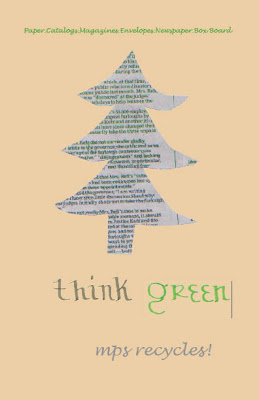
Our group was Sam, Tessa and I, and when we started, Tessa had a great idea of making shapes of things that go into the bins on the poster, like the tree and bottle. We all then decided that adding the material that actually goes into the bins was another great idea. So we started making those. The "THINK GREEN" are both things that are written. We had scanned them onto the computer because we couldn't find a good font to match the mps recycles, because nothing really went well with it. We knew that we wanted the mps recycles to look like that, so we didn't change the font of it. We also thought that the white background was kind of boring on the recycling bins now, so we changed it to a tan color, which really went nicely with the pictures that we included. We wanted both to match really well together, so we just decided to change the picture that went on the paper instead of making a two different types of signs, so this way it matches. To us, it was nice because it was very simple and right to the point but it was nicer than what the bins have on them now, which, to be honest,  are very dull. We all worked together to make this happen, which was another great part of this project. I think we made the new signs much better than they were better and I really like them. Also it was great working with Tessa and Sam because we used the time wisely and we knew what we wanted to do! (:

Friday, October 8, 2010

Re-creating Bad Ad


Re-doing this ad was kind of hard for me to start because I didn't really know where to start on the ad. I really found it hard to get up and going on my feet. After I plotted some ideas down, I found it easier to start because I deleted and added things as they came to my mind. The colors were hard to also pick out because I wasn't sure if they always matched the colors that were in the pictures. When I started, I knew that I wanted to make the top centered align because thats the type of ad I like. The hard part of that was picking how to do the text because I wasn't sure on if I should make it center aligned also. I decided against this and put it all on the right side. The border was another idea that I added at the end because the ad felt like it had too much blank space left.  Overall, I think the hardest part of the ad was starting to re-create the ad because I didn't have an idea to jump right into. Also finishing was hard because I wasn't sure if it looked okay and if it needed more ideas to go alone with it.

picture from:  http://getsetimagine.com/images/colonial_drummer_with_color_2cr4.jpg

Tuesday, September 21, 2010

Recreation

The recreation of this editors page was a little bit of a struggle for me. At times, I couldn't really figure out how to do some of the things that had to be used for the page. The picture of all the editors was the hardest, though, for me because I couldn't get it the picture to be the right size and fit the box. The picture keep cutting people off or showing more of the picture than was needed. Using the pen tool was actually okay for me, because I tried making the shape, it worked out great. Though I deleted it by accident and couldn't get it like that again, the pen tool was easy to use and I enjoyed using it. Placing where the white shapes went was hard to place also and I couldn't really figure out how to get rid of the white below the green part where they go. I still can't really figure this out. Getting the text in there was good for me also because it didn't take too long to do and it was easy. Overall, this experience was a positive one that was fun, but it took a very long time and was challenging to find out at some time.

Friday, September 3, 2010

Design(:

For me, I have had a little bit of design before. Usually when I make a card for someone, I like to make it handmade because to me, that means more to a person. I usually make birthday cards for someone and sometimes on the computer; I have to design it with this program that I have at home. You get to pick what style of card you would like and then you have to go and decide what the card is going to look like. I remember one that I did for my best friend, and I make a card that had a ton of colors, and had alot of pictures. The hardest thing with that was figuring out how to make it really nice though, and by the time I finished it was. This is really what my design experience has been, though I have done some more with scrap-booking and designing some posters for my old school. For scrap-booking, every time that I go to a concert, I make a scrap-book of the night there and have to design it the way I like it.